In case you hadn’t already noticed, I am a die hard peanut butter fan. DIE. HARD. Especially in baking and deserts, I just think that salty peanut butter added into sweet treats is a match made in heaven.
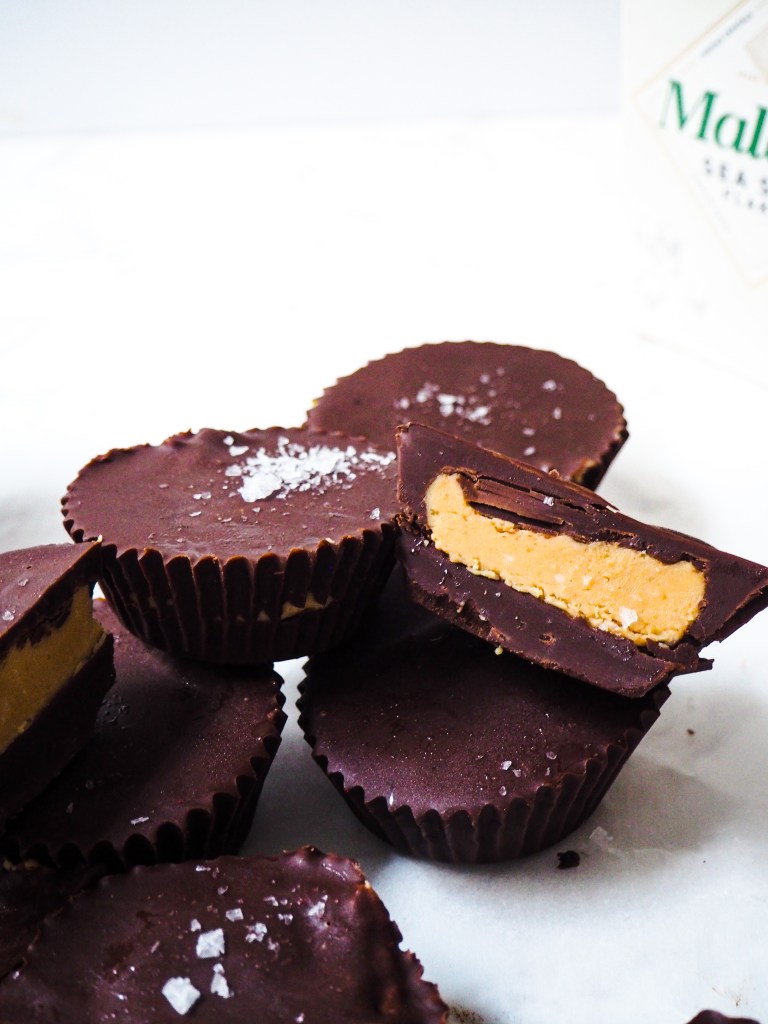
You allll know about Reese’s Peanut Butter Cups, they are delicious and a genius invention. But, dare I say it, I think that home made ones are better and in particular, these. The chocolate in chunkier and thicker (can only be a good thing, am i riiiiite?) and the peanut butter filling is a little sweeter and creamier. They’re just so delicious.

To make things even better, they’re so easy to make, you don’t even have to turn your oven on. So this isn’t really so much a recipe as an assembly job, so baking required just a couple hours of your time and some kitchen cupboard staples.

These are the perfect treat to have in your fridge throughout the week to snack on, you HAVE to make these!
INGREDIENTS
- 450g chocolate (I use about 70% dark chocolate and 30% milk chocolate for the perfect balance to my taste but you do you)
- 2tbsp coconut oil
- 3 heaped tbsp of smooth peanut butter
- 50g icing sugar
- 50g butter, softened
- 1tbsp whole milk
METHOD
- Line a muffin or cupcake tin with cupcake cases (if you don’t have them you can use cling film)
- Melt together the chocolate and coconut oil in a bowl over a saucepan of boiling water. It’s important to melt the chocolate slowly so avoid it burning, once it burns you can’t go back!
- Pour in enough of the melted chocolate into each case to fill about 1\3 of the cases then put into the freeze for at least 15 minutes so they can firm up.
- While the chocolate bases are in the freezer, make the peanut butter filling by beating together the peanut butter, butter, icing sugar and milk until super smooth and creamy.
- When the bases are out of the freezer, spoon in approx 1tbsp of the peanut butter filling onto the chocolate and smooth it out into an even layer, then pour the remaining 2\3 over the top. Put them back into the freezer for at least 30 minutes (or the fridge for 4 hours) until completely firm. Then ENJOY!
Thank you so much for stopping by, I hope you enjoyed this post and feel inspired to make something delicious!
If you’re hungry for more @claudiashomekitchen is full of all things yummy!
